
Minimally invasive treatment options in the atrophied bone: The Bone Truss Bridge approach
Atrophy of the maxilla poses significant challenges to dental rehabilitation, particularly in the context of dental implant placement. There exist numerous approaches to manage such scenarios, ranging from invasive techniques such as zygomatic implants, sinus lifting, and bone grafting, to more minimal invasive methods utilising pterygoid implants and the trans-nasal approach. The latter techniques are particularly interesting due to their potential for early loading, where patients can receive a fixed rehabilitation within two to three weeks post-operatively. This article aims to present three case reports showcasing the clinical use of one-piece tissue level implants and fixed screw retained bridges in the management of maxillary atrophy.
Introduction
Rehabilitation of atrophied maxilla is a big challenge for practitioners working in the field of dental implantology. Severe maxillary atrophy, resulting from factors such as long-term edentulism, trauma, or congenital deficiencies, can lead to compromised bone volume and density, posing limitations on the conventional placement of dental implants1.
Despite the challenge and depending on the degree of maxillary bone atrophy, there are many approaches like bone grafting techniques and sinus lifting, zygomatic implants, the all-on-four principle, and other techniques provided. All the previous approaches are very complex and associated with a high degree of morbidity2. Autologous bone augmentation techniques are regarded as the “gold standard” in the treatment of severely atrophic maxilla3.
These procedures are often time-consuming, pose a risk of graft loss, and are commonly associated with donor site morbidity, which is why elderly patients, in particular, or patients who have previously experienced reconstruction loss, often refuse repeat treatment with these techniques. Other techniques like the placement of implants in the pterygomaxillary region; distal to the maxillary tuberosity and engaging pterygoid bone were proposed4. In pre- maxilla when there is insufficient bone volume; trans-nasal implants were used5. This article aims to present a novel implant placement technique for atrophied cases of maxilla without bone graft and sinus lifting and with early loading of the prosthesis.
Clinical and radiographic evaluation
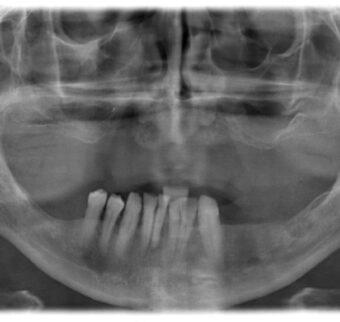
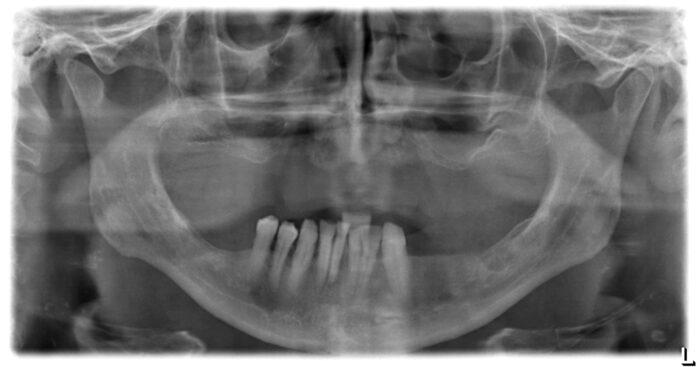
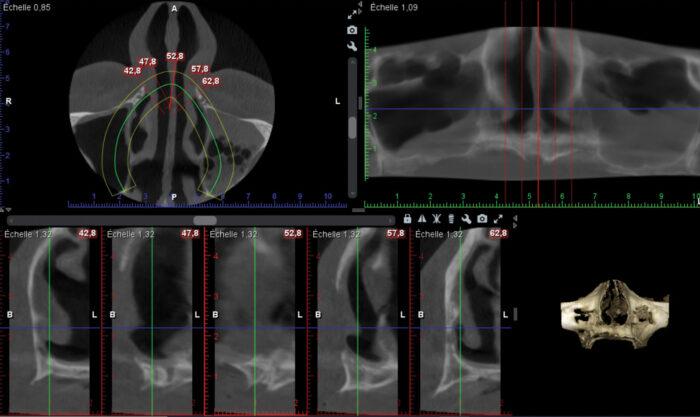
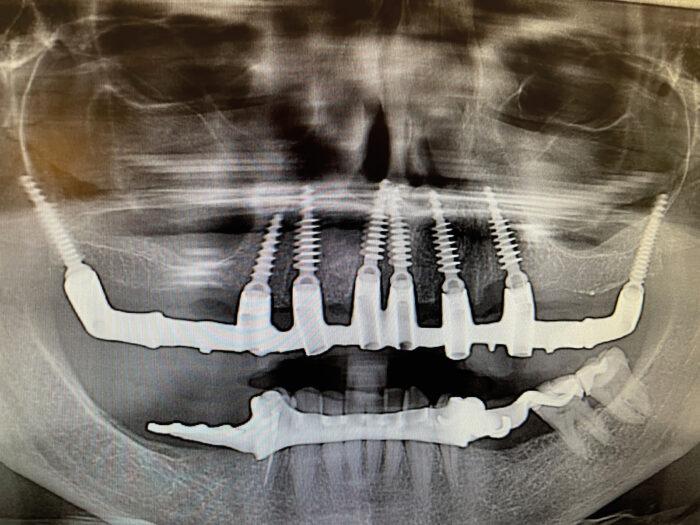
After clinical evaluation, a radiographic evaluation of Orthopantomogram (OPG) and Cone beam computed tomography (CBCT) was done for the patients (Figures 1 and 2).
Case one
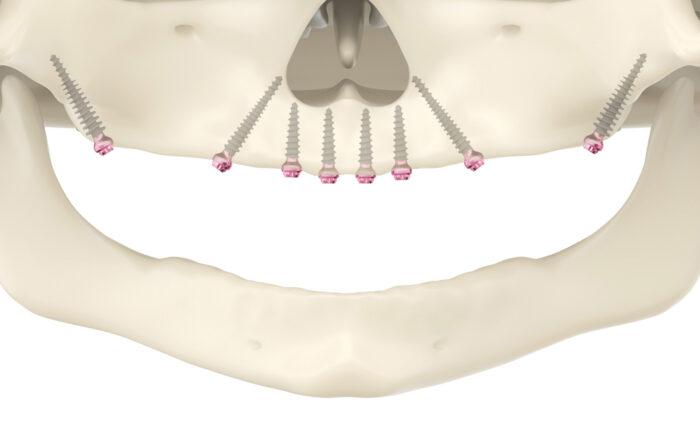
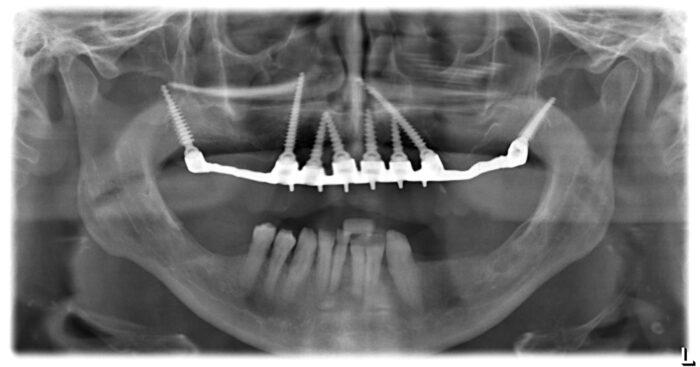
In this step, we measured the quantity (height and width) of available bone. The treatment options were presented to the patients and then the proposed approach was illustrated for them; eight implants were placed (two in the pterygoid region, two in the trans-nasal region and four in the anterior segment of the maxilla) with a flap approach and early loading of the prosthesis (Figure 3).
Type of implants used
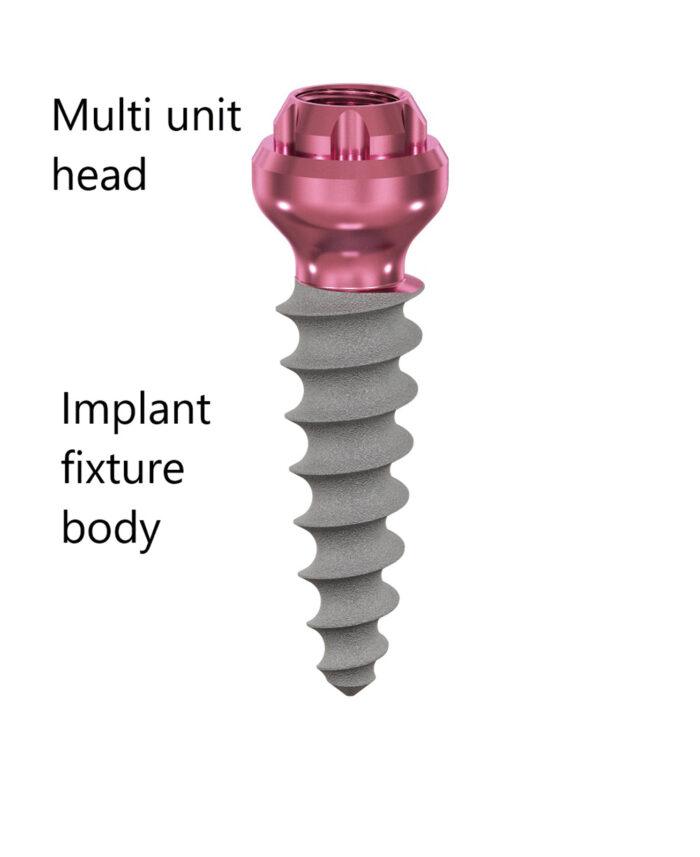
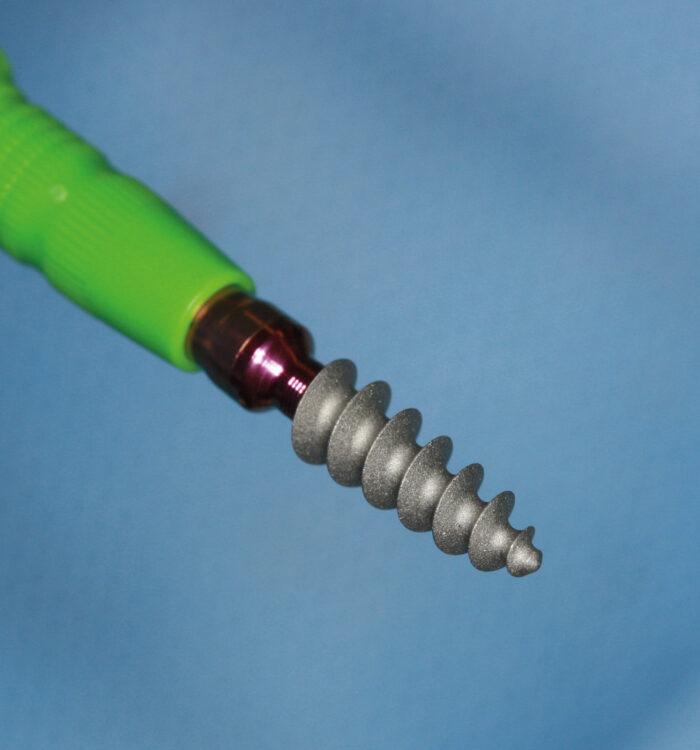
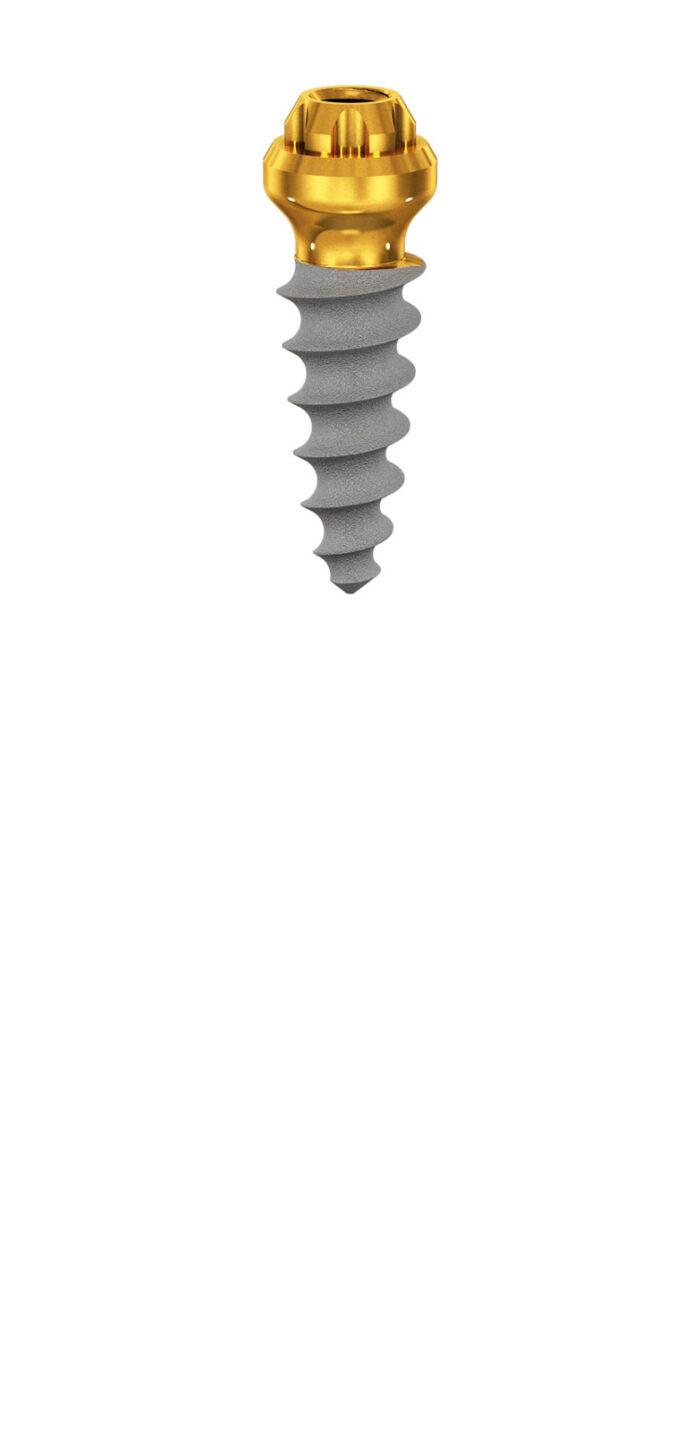
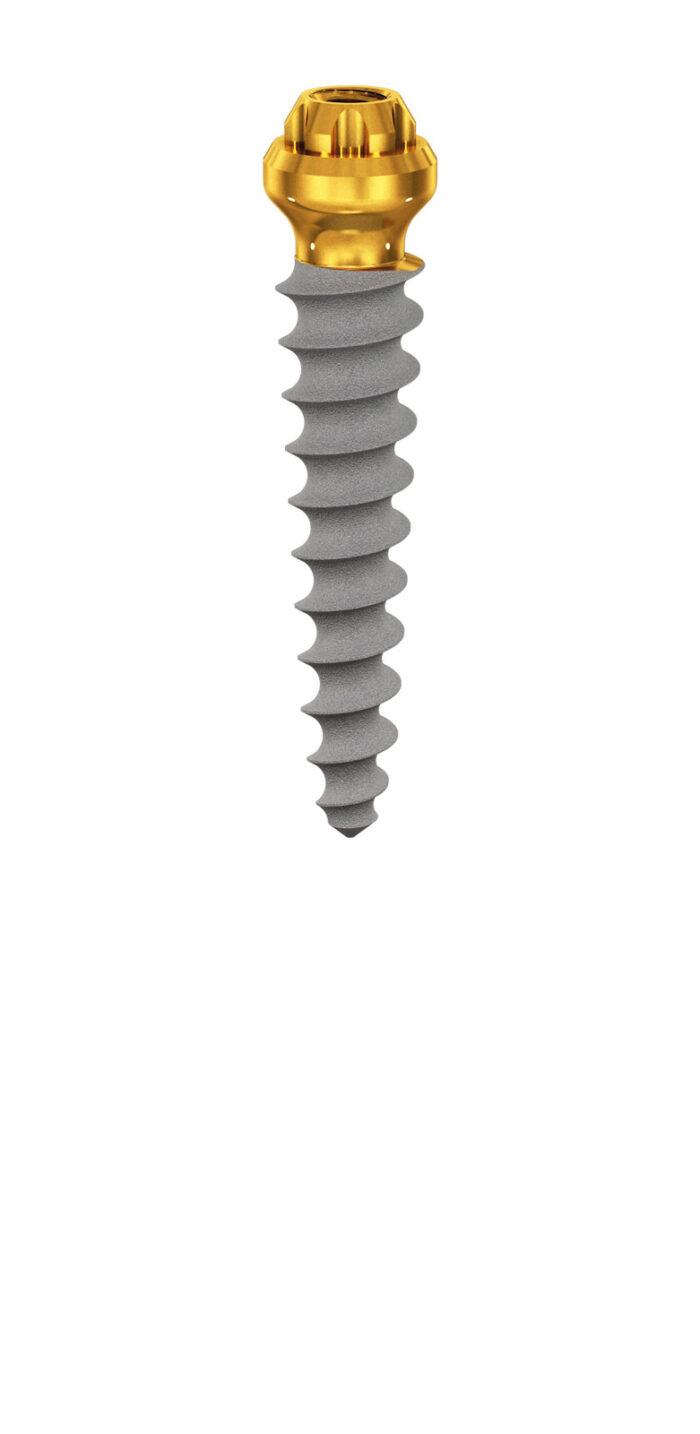
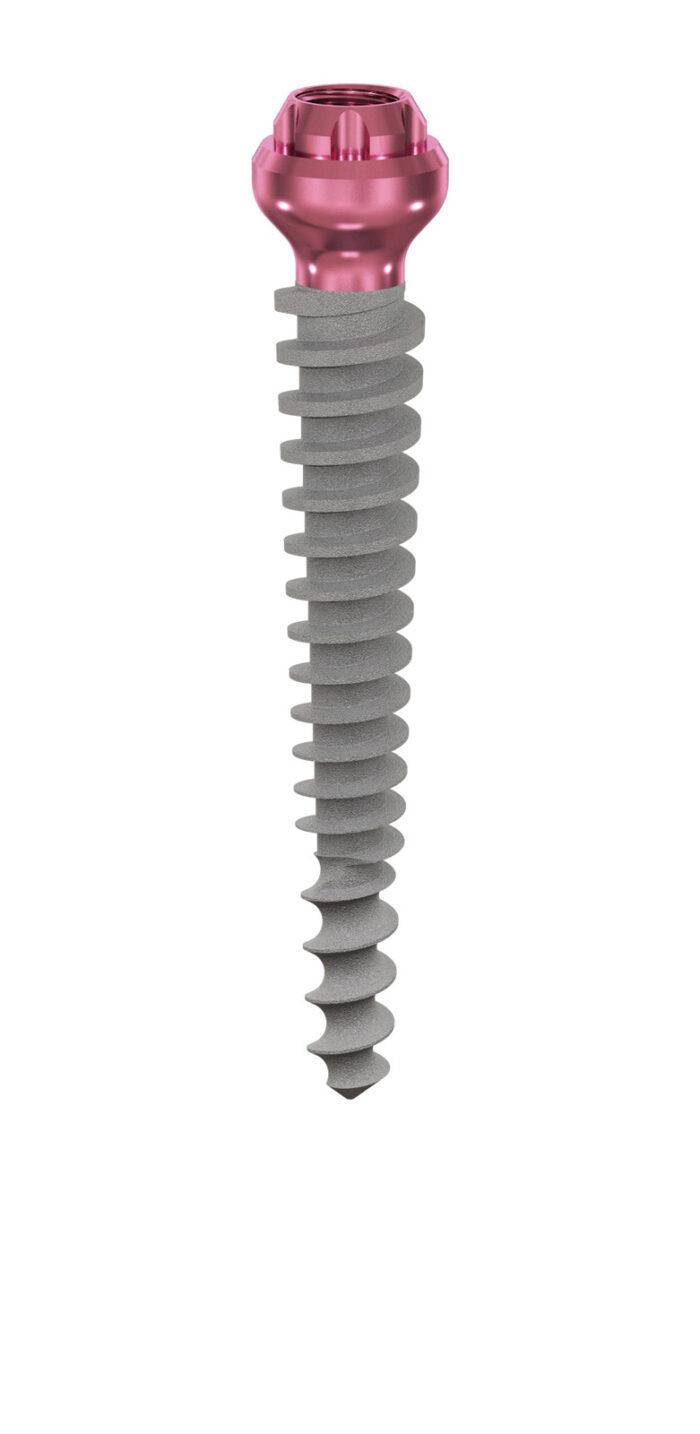
Compressive Multi-unit Implants from the ROOTT Implant System (TRATE AG, Swiss) were used (Figure 4 and 4b and Figure 5). Implants are specifically engineered for use in narrow ridges and atrophied cases. The implant body is tapered; it ensures a high implant stability which encourages an immediate loading process6.
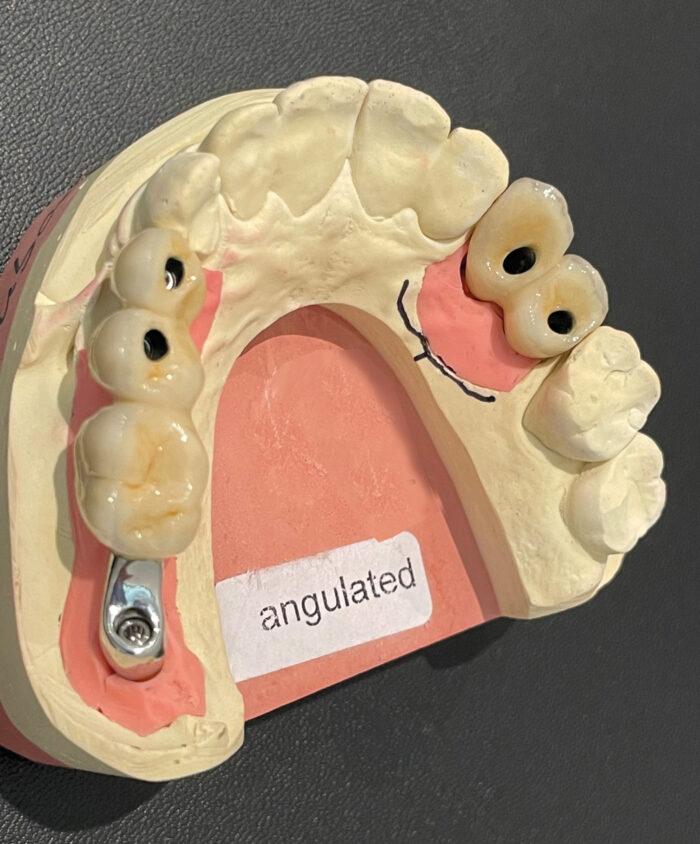
One of the major advantages of this type of implant is that they have a fixed multi-unit head which allows the angulation of the implant to be easily solved in the prosthetic phase. Another point regarding this type of implant is the type of fixation of the prosthesis which is a screw-type fixation.
Surgical procedure
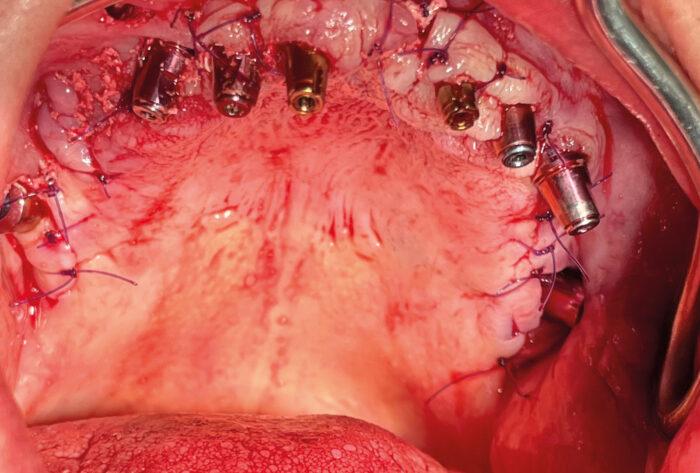
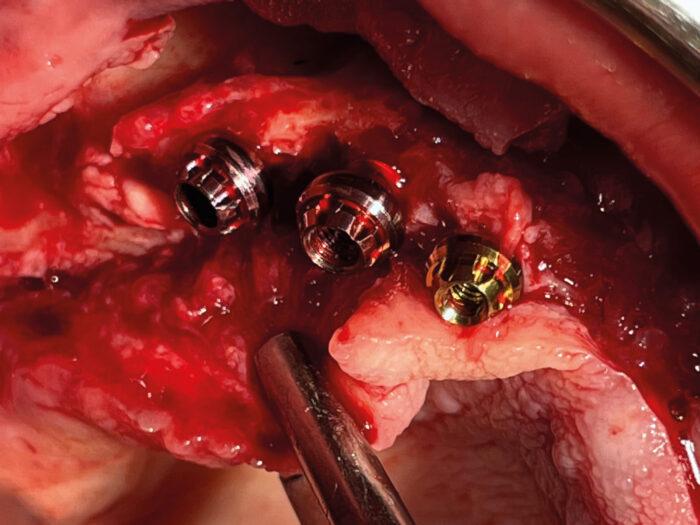
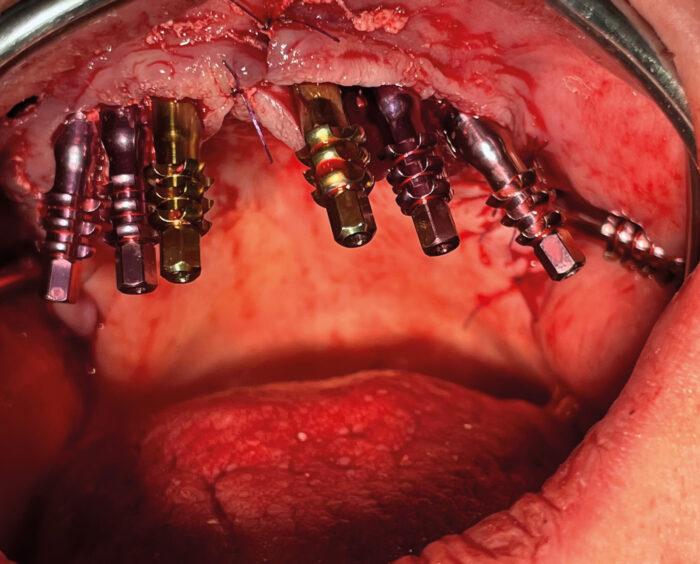
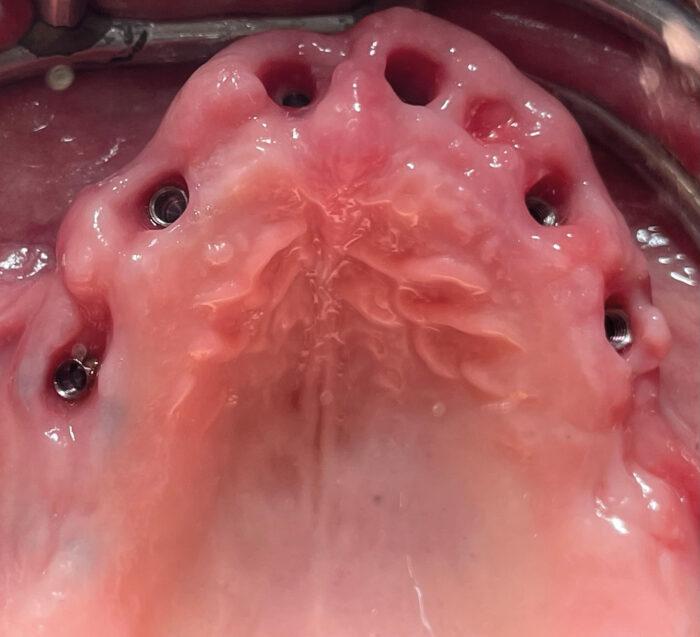
Local anesthesia with a vasoconstrictor was administered to contain local bleeding and intra and post-operative pain. After anesthesia achievement, a crestal linear incision was made extending to the distal of the maxillary tuberosity, the flap was reflected and eight implants were placed. All implants were placed with high primary stability. The flap returned back in place and sutured with monofilament suture material, Polyamide 4/0 (Figure 6).
Prosthetic phase
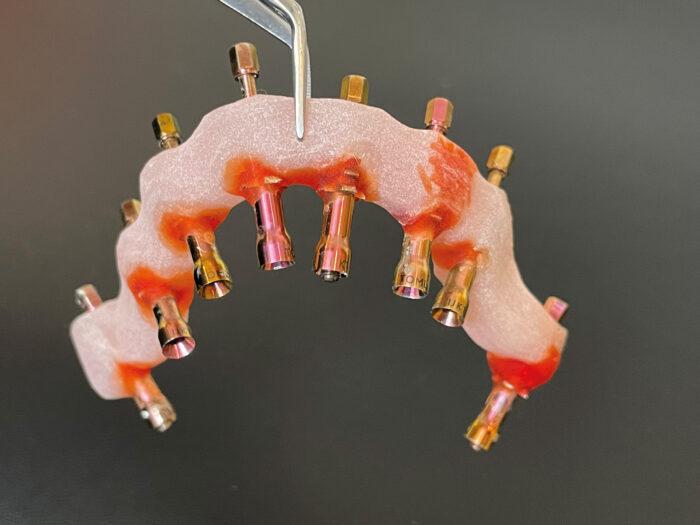
After the surgical procedure, direct impressions were taken using open-tray impression transfers and silicon impression materials (Figure 7).
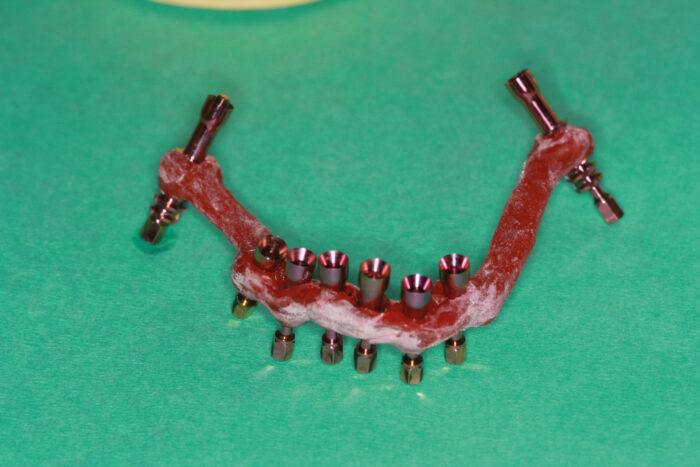
On the next appointment (after one week) a verification jig was tried to control the impression and to ensure that your final screw-retained framework has the optimum passive fit (Figure 8). Plus, a verification jig is used to verify that the master model is accurate before manufacturing the framework7. The material used for the verification jig fabrication was pattern resin from GC America.
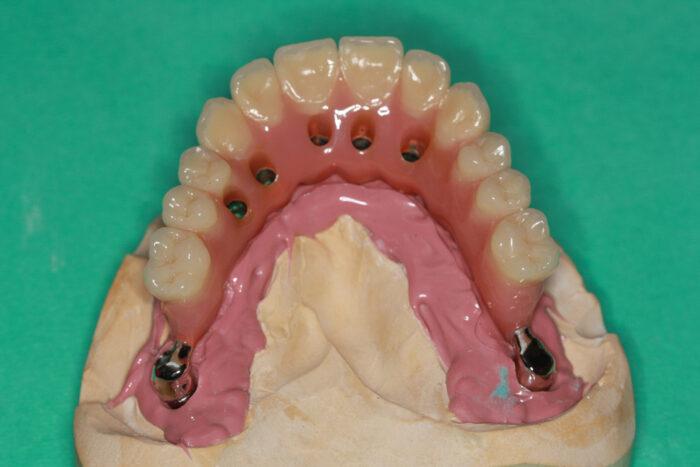
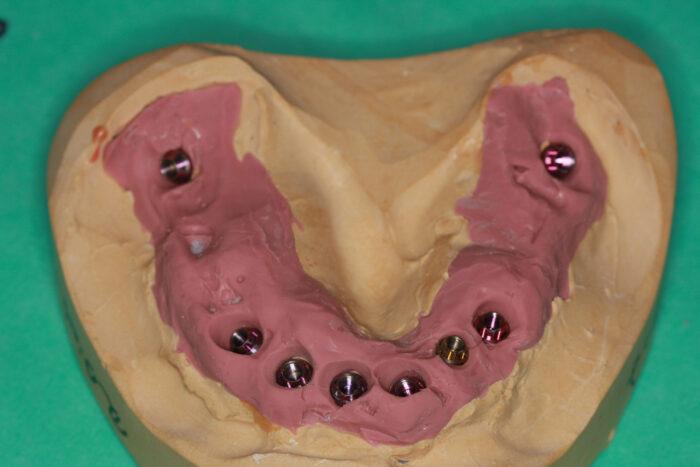
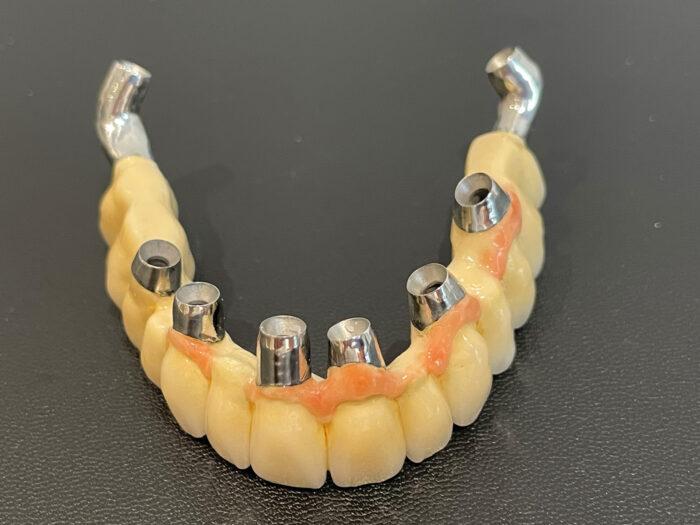
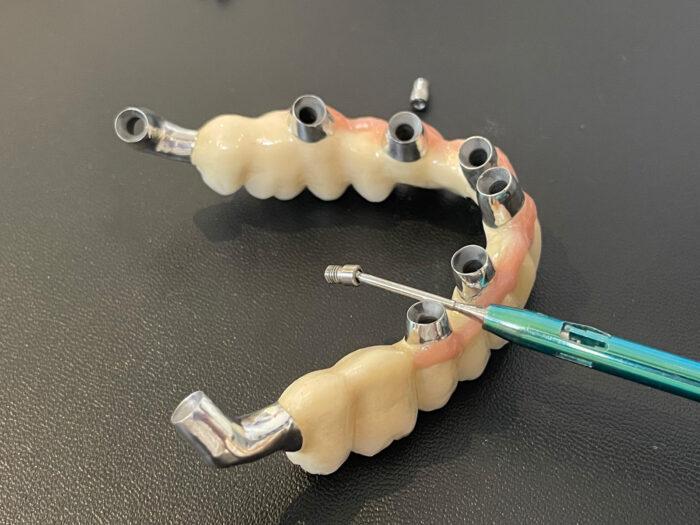
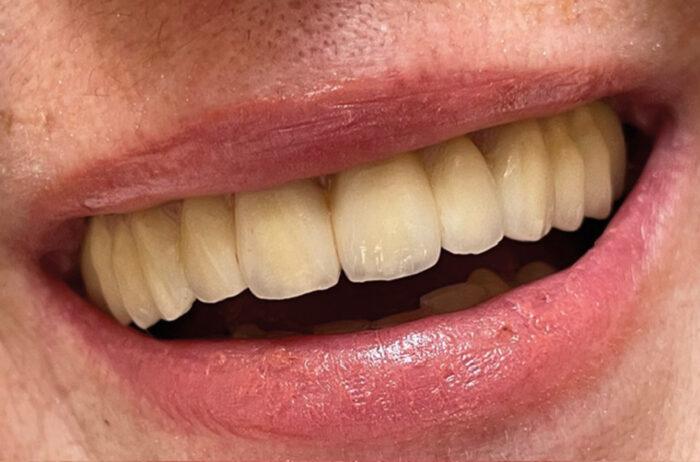
On the next visit, the fitness of the prosthetic frame and occlusal bite were checked. As there was severe atrophy of hard and soft tissue in this case, and with increased inter-arch space with opposite dentition, the size of the prosthesis was very large, so we made the prosthesis with a metal frame with acrylic prosthesis and acrylic resin prosthetic teeth, and we ended having a prosthesis that was not too heavy thus increasing the patient’s satisfaction. The final prosthesis was fixed three weeks later8 (Figures 9, 9b and 10).
Case two
A 58-year-old woman came with a broken bridge and wanted a tooth replacement but as minimally invasive as possible. We explained the different treatment options to the patient and by explaining to her the Bone Truss Bridge (BTB) approach by early loading; she chose that treatment option.
In this case there was bone remaining and it was possible to deliver directly a metal ceramic bridge. All teeth in the maxilla were removed and implants One Piece Compressive Tissue level (ROOTT) were placed. In the pterygoid area at the right side a C 45/2o P implant was placed with a high torque around 70 N/cm and at the left side a C 35/20 P also with the same torque around 70 N/cm. In the extraction sockets were placed C 45/16 P implants and at position 15 a C 35/12 m implant was placed. As all implants were placed with a high torque; early loading was an option9.
After the surgery a temporary bridge was done chairside to be in mouth for around three weeks, time in which to finish the metal ceramic bridge. At the second appointment, a verification jig is tried (Figure 11). At another appointment aesthetics was tried as well as the frame and at the fourth appointment, three weeks later we could place the metal ceramic bridge screw retained (Figures 12 to 16). Thanks to the efficiency of these type of implants, compressive threads and high primary stability, early loading procedure is possible and long-term results are excellent.
Case three
The patient, a 75-year-old woman, wanted to get fixed teeth in her maxilla. She had a sinus lift some years before, but it failed and so was happy to have another opportunity to gain fixed teeth (Figure 17 Initial situation). During surgery, the left side was done as well. Tooth 23 was removed and Two Piece Implants (ROOTT, 3.5/12 mm and 3.5/8 mm) were inserted on the left side. On the right side there was a minimum of bone remaining and here three One Piece Tissue Level Implants (ROOTT) were inserted by open flap. After four months, impressions were taken (Figures 18 to 22).
Discussion
The rehabilitation of severely to atrophied maxilla remains a formidable challenge in dental implantology. Traditional approaches, involving bone grafting, sinus lifting and various other complex techniques often present high morbidity and prolonged treatment periods. In this article, we presented a technique for dental implant placement bypassing the need for bone grafts or sinus lifting which exhibited promising results in term of success rates, absence of complications and patient satisfaction10, 11. Our outcomes align with the growing interest in techniques offering a less invasive alternative for atrophied maxilla rehabilitation.
References
- Esposito M, Grusovin MG, Felice P, Karatzopoulos G, Worthington HV, Coulthard P. The efficacy of horizontal and vertical bone augmentation procedures for dental implants – a Cochrane systematic review. European Journal of Oral Implantology. 2009; Summer; 2(3):167-84.
- Ishak, M.I. and Kadir, M.R.A. Treatment options for severely atrophic maxillae, SpringerLink. 1970. (Accessed: 12 December 2023).
- Meloni, S. M., Jovanovic, S., Urban, I. A., Canullo, L., Pisano, M., & Tallarico, M. Horizontal Ridge Augmentation using GBR with a Native Collagen Membrane and 1:1 Ratio of Particulated Xenograft and Autologous Bone: A 1-Year Prospective Clinical Study. Clinical Implant Dentistry and Related Research. 2016; 19(1), 38–45.
- Valero JF, Long-term results in placement of screw-type implants in the pterygomaxillary-pyramidal region. International Journal of Oral Maxillofacial Implants. 2007; 22:195–200.
- Paulo H.T. Almeida, Sergio H. Cacciacane and Ayrton Arcazas Junior. Extra-long trans-nasal implants as alternative for Quad Zygoma: Case report. Annals of Medicine and Surgery. 2021; 68.
- Wu AY, Hsu JT, Chee W, Lin YT, Fuh LJ, et al. Biomechanical evaluation of one-piece and two-piece small-diameter dental implants: in-vitro experimental and three-dimensional finite element analyses. J Formos Med Assoc. 2016; 115: 794-800. PubMed.
- Buzayan MM, Yunus NB: Passive fit in screw retained multi-unit implant prosthesis understanding and achieving: a review of the literature. Journal of Indian Prosthodontic Society. 2014; 14:16-23. 10.1007/s13191-013-0343-x
- Smith, D. E., & Zarb, G. A. Criteria for success of osseointegrated endosseous implants. Journal of Prosthetic Dentistry. 1989; 62(5), 567–572.
- Korn, P., Gellrich, N., Spalthoff, S., Jehn, P., Eckstein, F. M., Lentge, F. et al. Managing the severely atrophic maxilla: farewell to zygomatic implants and extensive augmentations? Journal of Stomatology, Oral and Maxillofacial Surgery. 2022; 123(5), 562–565.
- Ramezanzade, S., Aeinehvand, M., Khurshid, Z., Keyhan, S. O., Fallahi, H. R., & Abbasi, A. Treatment Options for oral Rehabilitation of the atrophic maxilla: a literature review. Avicenna Journal of Dental Research. 2023; 15(3), 122–133.
- Mersel, A. Oral rehabilitation for compromised and elderly patients. Springer. 2018
You must be logged in to post a comment.